
Table of Contents
A Complete HVAC Inspection Checklist for San Francisco Homeowners
Use this hvac inspection checklist to keep your San Francisco home comfortable year-round. Follow these steps monthly to catch issues early.
- Thermostat: Check the settings and replace batteries. Confirm the system is set to the correct mode for the season—cooling for warmer days, heating for the foggy periods common in the city.
- Air Filters: Inspect and replace filters monthly. San Francisco’s mild climate means your system cycles regularly, so clean filters are essential for good airflow.
- Evaporator Coil: Look for visible dirt or debris on the indoor coil. Schedule a professional evaporator coil cleaning if buildup is present to maintain efficiency.
- Furnace Heat Exchanger: Visually inspect for any signs of rust or cracks. A professional furnace heat exchanger inspection is the safest way to check for dangerous carbon monoxide leaks.
- Outdoor Condenser Unit: Clear away leaves, debris, and overgrown plants to ensure two feet of clearance. The coastal air of San Francisco can accelerate corrosion, so look for rust on the fins.
- Unusual Noises: Listen for banging, squealing, or rattling during a cycle. These sounds are common signs HVAC needs repair and warrant an immediate call to a technician.
- Annual Tune-Up: Schedule a professional maintenance visit. A yearly inspection can uncover hidden problems before they become major repairs, keeping your system reliable.
Before You Begin an HVAC Inspection in San Francisco
A thorough hvac inspection checklist starts with deliberate preparation, particularly in San Francisco where aging infrastructure and consistent coastal moisture pose specific hurdles. Prioritizing readiness keeps the process safe and productive. Preparation reduces safety risks and improves diagnostic accuracy, helping you spot problems much earlier before they worsen.
First, confirm the entire system is completely powered off. In San Francisco’s older buildings, this may require shutting off a dedicated breaker. Gather a flashlight, multimeter, screwdrivers, and a camera to document any findings. Also, visit the U.S. Department of Energy website to review current benchmarks — aligning your work with HVAC efficiency government resources ensures the inspection reflects up-to-date federal recommendations.
With the system offline, prepare to examine components substantially influenced by local conditions. An evaporator coil cleaning should be anticipated because San Francisco’s mild, damp air accelerates microbial growth and corrosion on coils. Similarly, a furnace heat exchanger inspection demands caution; have a carbon monoxide detector and proper ventilation ready before scrutinizing this critical element.
With these preparations complete, you can now proceed to a systematic inspection of the system.
Check the Thermostat and System Controls
As part of your HVAC inspection checklist, start with the thermost at — a quick check that often solves the problem before you need furnace repair. Confirm the display is active and replace worn batteries if it stays blank. Ensure the circuit breaker labeled furnace or heat has not tripped, then set the system mode to Heat and raise the temperature set point at least five degrees above the current room reading. Smart thermost at models add another layer: verify Wi-Fi connectivity and review app-based schedules or away modes that may have overridden your manual settings. Look for any error code on the display — most modern units flash a numeric alert when a system fault is detected — and note the code before you reset the device.
If these controls pass inspection but the furnance still does not respond, the cause lies deeper. Later steps in this guide cover evaporator coil cleaning and furnance heat exchanger inspection, both of which require professional attention in San Francisco and the surrounding communities. When your thermost at and power checks are fine yet your home stays cold, contact us for professional furnace repair in San Francisco.
Inspect the Air Filter and Return Vents
As part of your hvac inspection checklist, the first and most impactful step is examining the air filter and return vents—two of the most common causes of weak airflow. Before you begin, turn off the system at the thermostat or breaker for safety. Locate the air filter, which in many San Francisco homes sits in a hallway ceiling grille or directly in the return duct near the air handler. Remove the filter and hold it up to a light source. If light does not pass through, the filter is clogged and must be replaced. A clean filter is essential for proper airflow and indoor comfort, and San Francisco Expert HVAC recommends replacing it every one to three months based on usage.
Next, walk through each room and check all return registers. Furniture, curtains, rugs, or closed louvers frequently block return vents, forcing the system to strain and reducing efficiency. Vacuum the vent cover if you see dust buildup, but deeper cleaning such as evaporator coil cleaning or furnace heat exchanger inspection should be left to professionals. Blocked returns create negative pressure that can lead to frozen coils or overheating. Once the filter and vents are cleared, if your system still struggles with weak airflow, it may be more cost-effective to explore HVAC replacement cost in San Francisco.
Examine Electrical Connections and Components
An hvac inspection checklist must include a thorough examination of all electrical connections and components, as faulty wiring is a common but often overlooked cause of system issues in San Francisco homes. Before touching any part of the system, turn off power completely at the disconnect switch and at the breaker panel—this is the single most important safety step in the entire process.
Visually inspect the capacitor for bulging, leaking fluid, or a burnt odor; a failed capacitor often hums but won’t actually start the fan motor. Next, check the contactor for piting or melted contacts, and examine all relay switches and wiring insulation for cracks, brittleness, or discoloration from overheating. Loose wire nuts and corrosion on terminals are red flags that can cause intermintent operation or reduce blower motor speed, directly leading to the weak airflow problems we have documented in our internal service guides.
If you are comfortable using a multimeter, test voltage and continuity across these components to confirm they operate within spec. Otherwisse, contact a licenced technician—electrical diagnosis is not a DIY task for most homeowners. Once all connections are verified, the next logical step on the checklist is moving to system cleanliness, specificaly checking the evaporator coil for dirt buildup that further restricts airflow.
Clean and Inspect the Evaporator Coils
Next, a critical item on any hvac inspection checklist is cleaning and inspecting the evaporator coils. In San Francisco’s climate, where seasonal humidity and wildfire ash can circulate through homes, coils can accumulate debris more quickly than many homeowners realize. This step protects both system performance and the air your family breathes.
Turn off all power to the HVAC unit at the breaker before you begin. The evaporator coil sits inside the air handler or above the furnace; remove the access panel to expose it. For effective evaporator coil cleaning, use a soft brush or fin comb to gently loosen surface dirt and dust. Apply a no rinse coil cleaner according to the product instructions, taking care never to bend or flatten the delicate aluminum fins. Our technicians at San Francisco Express HVAC have seen firsthand how proper coil maintenance restores efficiency and prevents unnecessary strain on the system.
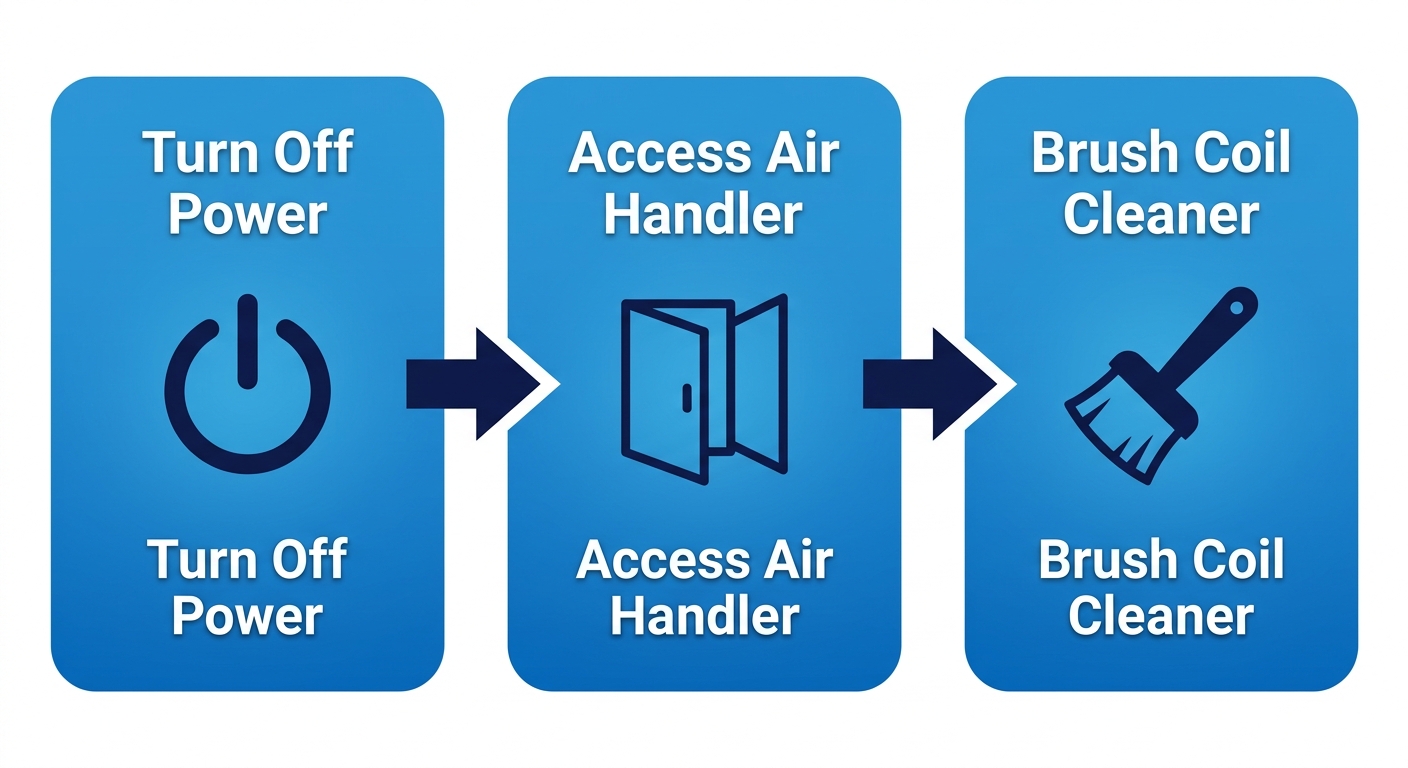
Clean evaporator coils in three steps
With the coils clean, inspect carefully for signs of corrosion, mold, or ice buildup, and check that the condensate drain pan is free of blockages. Clean evaporator coils contribute directly to better indoor air quality by allowing the system to filter and dehumidify air more efficiently, a principle we reinforce across all our maintenance guidance. With the coils clean and inspected, a furnace heat exchanger inspection should follow next.
Inspect the Outdoor Condenser Unit
After checking the indoor components, move outdoors to the condenser. Part of any thorough hvac inspection checklist is examining the outdoor unit, particularly in San Francisco’s foggy climate. Start by shutting off power at the disconnect box. Remove debris from the fins with a soft brush and use a fin comb to fix minor bends. Leave at least two feet of clear space around the unit on all sides consistently. Check the refrigerant line insulation for cracks; schedule a professional repair if needed. Also ensure the condenser sits level to prevent compressor damage. When the system operates, listen for grinding or rattling noises that warrant a technician’s attention. Per our heat pump rebates guide for San Francisco homeowners, routine condenser care also safeguards your eligibility for local incentives. After this check, move on to evaporator coil cleaning and furnace heat exchanger inspection.
Check the Furnace Heat Exchanger for Cracks and Leaks
After handling basic maintenance tasks like changing your air filter, your furnace heat exchanger inspection should be the next priority on your hvac inspection checklist. This component separates combustion gases from your home’s breathable air, and any crack can silently release carbon monoxide—an odorless, deadly gas—into your living space. In a city like San Francisco, where coastal fog drives frequent furnace use, older units in our historic homes are especially vulnerable to rust and metal fatigue.
When following your hvac inspection checklist, look closely for these warning signs:
- Sooty buildup around the burner compartment
- Rust or corrosion visible on the heat exchanger panels
- Hairline cracks on metal surfaces
- Unusual odors, often metallic or resembling formaldehyde
- Flame rollout or a yellow, flickering flame instead of a steady blue one
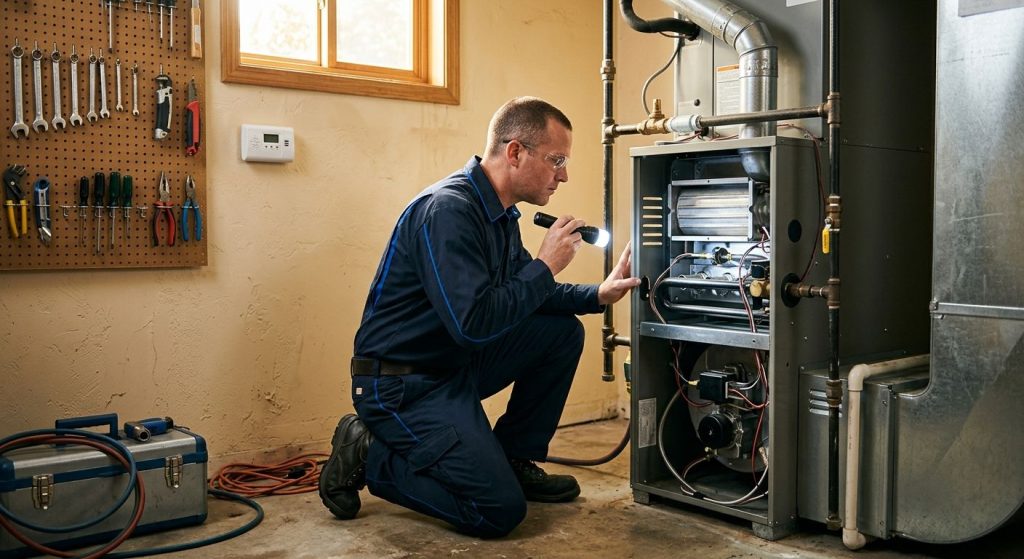
You can perform a basic visual check yourself using a flashlight and an inspection mirror, but spotting true microfractures requires specialized tools like a combustion analyzer or video scope. According to San Francisco Expert HVAC’s comprehensive furnace guide, a yellow flame alone indicates poor combustion and demands immediate attention. If you suspect any breach in the heat exchanger, shut the furnace down right away and call a certified technician. With 29 years of local experience serving homes in San Francisco, we have seen how quickly coastal moisture can corrode these critical components, and professional inspection remains the only way to confirm your system is truly safe.
Review Safety Controls and Carbon Monoxide Detection
After examining the heat exchanger and coils, it’s crucial to turn attention to safety controls and carbon monoxide detection within a thorough HVAC inspection checklist. Key safety controls to review include the flame sensor, limit switches, gas pressure switch, rollout switch, and thermocouple. Modern systems can shut down automatically if a limit switch or flame sensor fails, preventing hazards.
Since a cracked heat exchanger—found during a furnace heat exchanger inspection—is a primary source of carbon monoxide leaks, verifying CO detectors is essential. Test them by pressing the test button and replace batteries annually; detectors should be placed near sleeping areas and on every level. Local building codes in San Francisco require CO detectors in homes with gas appliances, and a professional can confirm compliance. While focusing on safety, it’s also wise to note that regular evaporator coil cleaning supports system efficiency and reduces fire risks. As San Francisco Express HVAC emphasizes, professional installations include safety checks and CO detection verification to protect households in San Francisco.
With safety controls verified, the next step in the inspection routine involves further performance checks.
Troubleshooting Common HVAC Issues Found During Inspection
If your hvac inspection checklist turned up unusual noises or weak airflow, you’re not alone — these are two of the most common post-inspection discoveries in San Francisco. While some fixes are simple, others demand immediate professional attention to prevent further damage. Understanding what each symptom means helps you decide when to tackle a task yourself and when to call San Francisco Expert HVAC.
Loud Banging or Squealing Noises
Banging sounds often point to serious mechanical trouble. According to San Francisco Expert HVAC’s internal diagnostics, a loose connecting rod, broken piston pin, or worn crankshaft bearing can create abrupt, heavy knocking inside the compressor. In a furnace, banging may signal a cracked heat exchanger — a dangerous condition that can leak carbon monoxide. A furnace heat exchanger inspection is critical whenever loud banging occurs, especially in older homes in San Francisco. Turn off the system immediately and schedule a professional evaluation.
Squealing noises generally indicate friction in moving parts. These high-pitched sounds typically come from a worn blower belt slipping on its pulley or failing motor bearings. Continuing to run the system can worsen the damage, turning a simple belt replacement into a full motor failure. Shut the equipment down and have a technician diagnose the source.
Weak Airflow from Central Vents
When airflow drops noticeably, start with the simplest checks. Replace clogged air filters — the most frequent cause of restricted airflow — and confirm that no furniture or curtains are blocking supply and return registers. If those steps don’t help, the problem may lie deeper: a failing blower motor, leaking ductwork common in older San Francisco properties, or a frozen evaporator coil. While evaporator coil cleaning can restore proper airflow, improper cleaning can damage the delicate fins, so this task is best left to a professional in San Francisco.
Routine inspection reveals problems early, but accurate diagnosis requires experience. If banging, squealing, or airflow issues persist after basic checks, contact San Francisco Expert HVAC for a thorough evaluation and safe, lasting repairs.
Keep Your San Francisco Home Comfortable with Regular HVAC Inspections
A key part of that maintenance is a thorough inspection using an hvac inspection checklist. Regular professional inspections catch small issues before they become costly emergencies, preserving your comfort through San Francisco’s mild yet varied climate. This proactive approach ensures your system runs efficiently when you need it most.
Two essential items on any inspection routine are evaporator coil cleaning and a furnace heat exchanger inspection. A clean evaporator coil improves cooling efficiency and indoor air quality, while examining the furnace heat exchanger is a critical safety check, as cracks can lead to dangerous carbon monoxide leaks. Following a structured checklist ensures no component is overlooked, saving you money on future repairs. Our internal cost data shows that catching problems early helps homeowners avoid premature, expensive replacements.
Staying on top of maintenance also has a financial benefit. Homeowners who maintain their systems can more easily qualify for available heat pump rebates. According to our internal rebate guide, some 2026 incentives in San Francisco require proof of regular professional maintenance.