
Table of Contents
Mini Split Interior Wall Installation Essentials
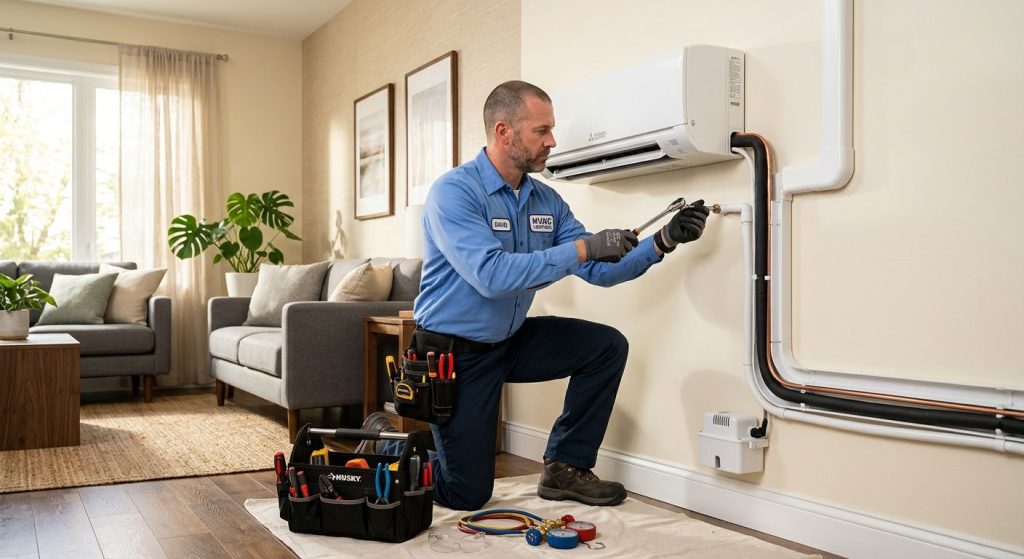
Can a ductless mini split be installed on an interior wall? Yes—it is possible, but the process demands extra planning and special components to handle drainage and line-set routing. According to the HVAC-Talk forum community, where installers share real-world insights, interior walls rarely offer a gravity drain path, so a condensate pump is often required to move moisture safely away. We also note commercial-grade mini pumps with alarm outputs can reduce water-damage risk and maintenance needs. Routing the refrigerant lines and electrical wiring also demands care; professionals avoid drilling through walls without a clear route to a basement or attic, as that can tear open drywall and damage the structure. Before you begin, we recommend thorough planning to avoid expensive repairs and keep your mini split running reliably.
Key Takeaways
- Installing a mini split on an interior wall demands more planning than an exterior placement.
- An indoor wall isn’t necessarily a dealbreaker for installing a mini-split unit.
- Before installing your new interior walls you’ll need some tools as well as materials.
- Before you can actually install a ductless minisplit, there are some things to consider.
- Installing an indoor unit on an interior wall means extra planning is needed because there is no direct path to the exterior for the line set and condensate drain.
Before You Begin
Installing a mini split on an interior wall demands more planning than an exterior placement. The biggest hurdles are condensate drainage and routing refrigerant lines without tearing open walls.
The gravity method is easiest but the walls in your house usually don’t give you a slope out. In most cases you will need to have some type of condensate pump installed. HVAC-Talk suggests using pumps which have alarm output wiring on them that shuts down the system when there is a drain backup. This prevents water damage. You should also always ensure that you have an alternative place where this drain can be run into such as a sink or basement.
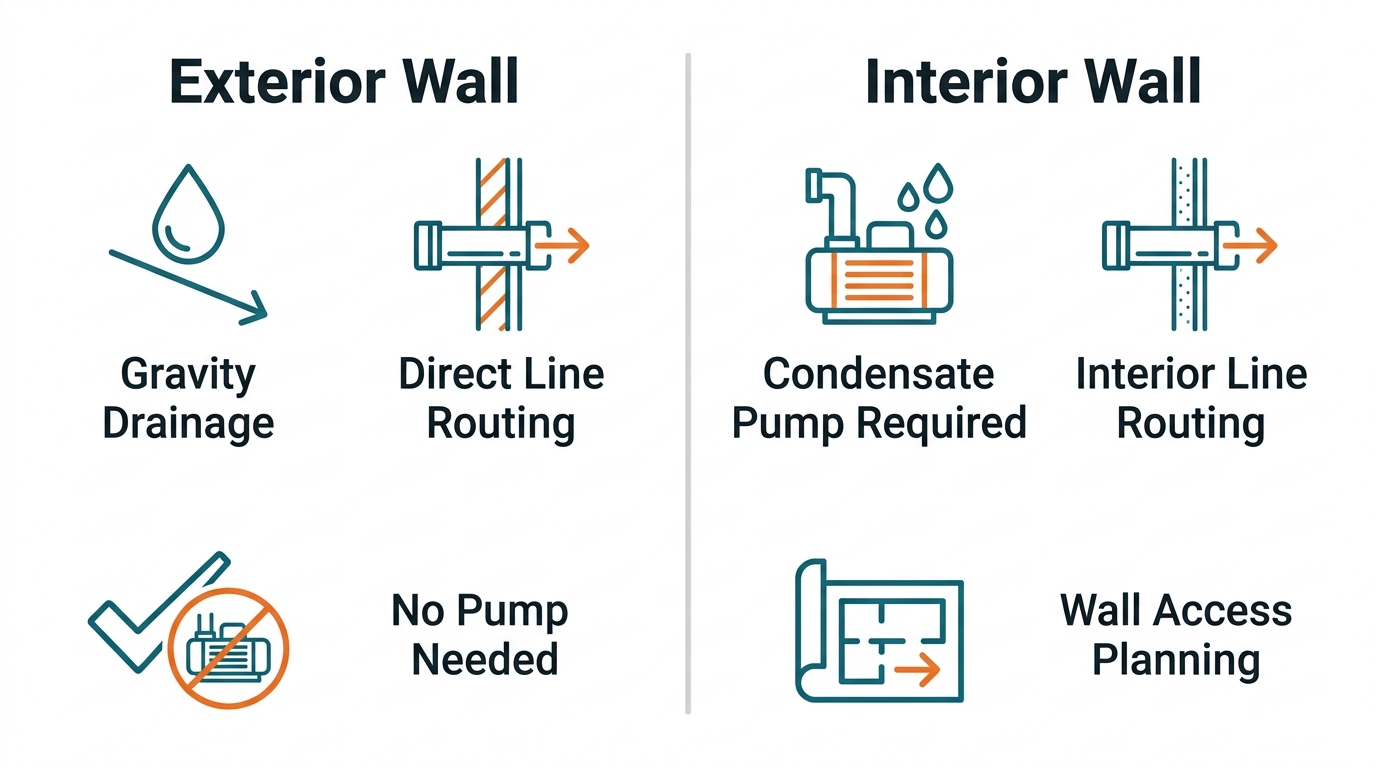
If you’re installing wires as line sets in your walls, you could use fish sticks and push them through any hollow spots in the walls, or install snap-together line-hide channels. Accessing these spaces through attic or crawl space openings would be helpful; if this isn’t possible, then tearing out major chunks of drywall will probably be needed. This indicates that another area may be easier than where you are now.
In cases where your project has to cut more than one stud or includes an elaborate drain line system, call San Francisco Expert HVAC. Our licensed technicians handle interior installations safely. After completing all the tasks, you should be able to finish planning out your wall and its place, which would also complete the initial phase of your plan.
Step 1: Assess Your Wall and Location
An indoor wall isn’t necessarily a dealbreaker for installing a mini-split unit. However, the success of the job depends on what you see before you ever start drilling holes. First, look at how your wall was constructed: is it just a simple partition with accessible stud cavities, or does it back onto a structural column or plumbing chase? Then trace out which path the line set, electricity cables, and condensate drain will take through your house. Industry practitioners point out that the most common stumbling block is drainage. When a gravity drain cannot reach the outdoors, a condensate pump becomes necessary, and its location inside the wall or an adjoining ceiling must be planned in advance. But the placement of these pumps is dependent on their location within the walls or ceiling. Then think about whether or not you’ll be able to enter the space directly over or under this wall, like an attic, basement, crawl space. If there’s nowhere else for the condensate to go but through a finished ceiling or into an occupied room below, it may require extensive drywall repair. So once you’ve figured all those things out, you’re ready to move on to gathering everything you’ll actually need to finish the job.
Step 2: Gather Tools and Materials
Before installing your new interior walls you’ll need some tools as well as materials. This will help minimize any unpleasant surprises along the way.
- A condensate pump with an alarm output shuts off the unit if backup occurs.
- A sturdy power drill with hole saws sized for your line set allows clean penetrations through studs and minimizes drywall damage.
- Fish tape or fiberglass rods help you route line sets and drain lines inside wall cavities, greatly reducing the need for destructive drywall removal.
- Closed-cell insulation and UV-resistant line set covers maintain cooling efficiency, prevent condensation, and protect the pipes where they run exposed.
- The manufacturer’s mounting bracket, heavy-duty anchors, and corrosion-resistant screws rated for your wall type ensure a secure, long-lasting indoor unit mount.
- Paintable line-hide channels conceal line sets and provide a neat finish on exposed walls, blending into your décor.
Now that you have all those at hand, you will be able to take care of any electric needs on the mini split.
Step 3: Determine Electrical Requirements
Before you can actually install a ductless minisplit, there are some things to consider. If the indoor unit will be attached to an inside wall, we have to first check on the electrical requirements for voltage, amps, and breaker size. Then check that our client’s house electrical panel has enough capacity to support the additional load and a free slot for a dedicated breaker. The breaker needs to be installed at a place where all local electrical code allows, as well as meeting the requirements from the unit itself.
When an interior wall prevents gravity drainage, a condensate pump becomes necessary. These pumps need their power supply, and many models include alarm outputs that can shut down the mini-split if the drain line backs up, preventing water damage. Planning for this electrical connection and mapping the path for the pump’s power cord and condensate line helps avoid surprises during installation.
With electricity sorted out, let us now fix that indoor unit into place on our walls.
Step 4: Mount the Indoor Unit
Installing an indoor unit on an interior wall means extra planning is needed because there is no direct path to the exterior for the line set and condensate drain. HVAC professionals note that a condensate pump is often necessary when gravity drainage is not possible.
First we check the wall type and select appropriate anchors or lag bolts for a secure hold. We verify that there is access to a basement, crawl space, or attic for routing the line set; running lines through a wall without such access can damage drywall and complicate future service.
- Position the bracket with a level and mark the mounting holes.
- Drill pilot holes and fasten the bracket securely.
- Lift the indoor unit onto the bracket and align it carefully.
- Secure the unit following the manufacturer’s instructions precisely.
Once the interior unit is securely mounted, we can proceed to run the line sets and condensate drain lines.
Step 5: Run Line Sets and Condensate Drainage
Routing the refrigerant lines and condensate drainage for an interior-wall mini split takes extra forethought because there is no direct exterior access. When deciding whether a ductless mini split can be installed on an interior wall, the line set routing and drainage requirements are the critical steps that determine project feasibility.
- We plan the route before cutting any drywall; many San Francisco homes offer basement or attic pathways that avoid damaging walls.
- We choose the drainage method carefully—if the indoor unit sits above a finished ceiling, a condensate pump is almost always necessary; gravity drainage works only when a downward path to a basement drain or outside is clear.
- We protect the structure by using fish sticks to guide lines through wall cavities or by installing paintable line-hide covers to keep everything clean and serviceable.
Once your lines are set up and your drain line is routed and secured, we can start on the electrical work.
Step 6: Complete Electrical Wiring
Planning ahead for your ductless mini split installation will minimize unwanted repair costs as well as ensuring a smooth job while wiring up the device onto an inside wall.
The indoor unit requires its own electrical circuit as instructed in the manual, usually at a voltage between 208-230 volts. We check the correct breaker size and wire gauge to be used prior to installation.
It can be tough routing the line set and drain through a wall from the inside, so we’ll either put in some fish sticks that you could route your lines down into the cavity, or install a paintable line hide channel that keeps everything accessible.
On interior walls, gravity drainage is seldom possible, so a condensate pump must therefore always be installed. According to forum postings, installing a reliable pump stops water damage to buildings because it shuts down the machine when the drain pipe gets blocked, which usually costs about $125.
Once the electrical cable was fixed up, then we tested the condensation pump. After making sure that all joints were correct as well that there weren’t any kinks in the lines, we proceeded to final test before actually completing our job site.
Step 7: Test and Commission the System
After electrical work has been done and inspected, then we will turn on and test out your new mini-split.
- Turn the system on at the disconnect and set the thermostat to a low cooling setpoint; verify the compressor, outdoor fan, and indoor airflow start within a few minutes.
- Check the indoor display or remote for flashing error codes and consult the manufacturer’s manual for exact definitions.
- Inspect all line-set connections and flare fittings with an electronic leak detector to confirm there are no refrigerant leaks.
- For heat-pump models, cycle heating to confirm the reversing valve engages and ensure fan-only mode provides uninterrupted circulation.
- For interior-wall installs, pour a small amount of clean water into the drain pan to confirm free flow to the pump or gravity outlet; verify condensate pump alarm outputs if used.
If any irregularities appear during testing, most problems have straightforward fixes; consult manufacturer manuals for exact specifications.
After your system passes its tests, you may encounter extra hurdles if the indoor unit sits on an interior wall. Placing a unit on an interior wall in San Francisco often means there is no direct route to the outside for the drain line. Without a clear downward slope, condensation cannot flow out by gravity alone. A condensate pump becomes necessary to lift the water up and push it to a suitable drain location. Forum discussions recommend choosing a commercial-grade pump with an alarm output that can shut the unit down if the pump fails, preventing water damage behind your drywall.
Routing the line set down into a wall interior has other problems as well. If there isn’t enough access up in either your basement or attic area, you may find yourself having to take out much more drywall than initially anticipated just to get things connected up. So what can be done? We will typically use fishsticks to run all this stuff down through the hole, or put in a paintable line hide over the top of the walls to cover up the mess that would occur if we were to actually go into the wall itself and dig out all the extra holes needed to fit our fittings in there. Either way though, remember to plan out the route for these various pieces before opening up any drywall…
After dealing with these problems, you will be able to get set up safely and efficiently. If you have questions about whether a wall placement may affect drainage or cable routing, call the experts at San Francisco Expert HVAC. Our pros in San Francisco have supplied residential solutions since 1997 to help ensure your mini split lasts for years.
Frequently Asked Questions
Is it Better to Run a Mini Split on 110 or 220?
Mini split systems operate on 208-230 volts, not 110. The unit requires a dedicated electrical circuit at a voltage between 208 and 230 volts, as per the manufacturer’s manual. Running on 110 volts is not recommended and would not power the system properly.
Mini split installation instructions
To install a mini split on an interior wall, first assess wall construction and drainage paths. Gather a condensate pump with alarm output, drill, fish tape, and mounting hardware. Ensure a dedicated 208-230V circuit and mount the bracket securely. Route refrigerant lines and drain using a pump if gravity fails. Complete wiring, then test for leaks, error codes, and proper drainage.
How to install mini split electrical wiring
Mini split electrical wiring requires a dedicated circuit at 208-230 volts. Check the unit’s required breaker size and wire gauge, then install a breaker in the panel. Route cables using fish sticks or line-hide channels. Connect the indoor unit and, for interior walls, wire the condensate pump with alarm outputs so it can shut off the system if the drain backs up, preventing water damage.
Ensuring a Safe and Efficient Mini Split Installation
A safe and efficient mini split installation on an interior wall succeeds through thorough planning before any equipment is mounted. For San Francisco homeowners wondering whether a ductless mini split can be installed on an interior wall, the answer is yes—with the right preparation. According to HVAC-Talk, interior wall placements require careful drainage and line set routing, especially where exterior access is absent. Condensate pumps become necessary when gravity drainage is impossible, a frequent reality when walls lack basement or crawlspace access. Professional installers avoid routing lines through enclosed walls without clear access to prevent costly drywall damage. We also plan for future maintenance access and clean-outs to simplify long-term servicing and prevent damage. We prioritize these measures to ensure every installation operates safely and efficiently for years to come.
Get Expert Mini Split Installation
Now that you’ve walked through the comprehensive steps—from assessing wall and location to testing and commissioning—you understand that interior wall installations demand meticulous planning for drainage and line set routing. Proper condensate pump placement and careful drywall protection are critical to avoid common pitfalls. The local team, located at 1725 Montgomery St, San Francisco, CA 94111, brings over 20 years of experience to every air conditioning installation. Our team is available 24/7 to handle your mini split project with precision. Calling (415) 371-9413 connects you to a professional who can ensure a safe, efficient installation. By choosing expert help, you can avoid the challenges highlighted throughout this guide and enjoy reliable comfort in your home.
Get Expert Mini Split Installation